Dart Backend Deployment From the Traditional to Modern Way
 Majid HajianHead of Developer Relations & Community @Globe
Introduction
The deployment of backend applications is one of the key aspects of software development. It influences the overall performance, scalability, and reliability of software solutions. Dart has gained popularity for its effectiveness in building server-side applications. However, deploying these traditional applications can present unique challenges and limitations.
This article will delve into the conventional approach to deploying a Dart backend, focusing on deploying it to a Virtual Machine (VM) in a single region. We’ll discuss the associated pains of handling such deployments, the potential risks, and the shift towards more distributed service architectures like microservices. Furthermore, we will delve into the complexities of managing infrastructure and how serverless approaches offer a remedy. Finally, we will see how Globe can help address these complexities for Dart backends.
Create an App
Let’s start by creating a utility backend that contains stateless business logic. Stateless business logic does not require a database or any filesystem and is not persistent.
CSV Transformer API
In this section, we will build a simple backend app using Dart Frog. This app will have an API that changes CSV data into different formats. Our main focus will be on the /transform/csv endpoint. We’ll use the Dart Frog framework to make this backend.
Setup and File Structure
Dart Frog allows us to create endpoints by creating corresponding folders and files. Our application has a folder called “routes,” which contains another folder called “transform.” Inside the “transform” folder is a file named “csv.dart”. This is where the code for the “{BASE_URL}/transform/csv” endpoint can be found. Dart Frog will translate our path under routes to HTTP endpoints.
.
├── README.md
├── helpers
├── middlewares
│   └── cors.dart
├── pubspec.yaml
└── routes
    ├── _middleware.dart
    ├── index.dart
    └── transform
        ├── csv.dart
        └── json.dart
Here’s a quick look at what our csv.dart file does:
// ...imports and other code...

Future<Response> onRequest(RequestContext context) async {
  // This is where we handle incoming requests
  final request = context.request;
  final method = request.method.value;

  if (method == 'POST') {
    return _handlePost(request);
  } else {
    return Response.json(
      statusCode: HttpStatus.methodNotAllowed,
      body: 'Method not allowed',
    );
  }
}
The onRequest function checks what kind of request we got (like GET or POST). Our endpoint only works with POST requests. If it’s not a POST, we tell the user that the method isn’t allowed. CSV data will be posted to the client to transform into JSON and return; that’s why POST is optimal.
// ...more code...

Future<Response> _handlePost(Request request) async {
  // ...code to get query parameters...

  final body = await request.body();

  if (type == CsvType.json.name) {
    return _handleJson(
      body: body,
      delimiter: delimiter,
      firstRowIsHeader: firstRowIsHeader,
    );
  } else if (type == CsvType.xml.name) {
    return _handleXml(body);
  } else {
    return Response.json(
      statusCode: HttpStatus.badRequest,
      body: 'Invalid type',
    );
  }
}
In _handlePost, we check what type of transformation the user wants (like JSON). If they choose JSON, we call _handleJson to do the work. Check the source code here for full implementation.

We’ve also thought about adding XML support in the future. If someone asks for XML, we say it’s yet to be available.
As this is a stateless business logic, any business logic applied can be handled without persistence or calling other resources. You will find more examples in the source code that cover business logic, such as
- Statistical Analysis: Endpoints for statistical computations like mean, median, mode, standard deviation, and variance on a dataset provided by the user.
- Data Transformation: Functionality for transforming data, such as normalization, scaling, or converting between different formats (e.g., CSV to JSON). That’s what we are doing now.
- Geometric Calculations: Create APIs for performing geometric calculations, such as area, volume, distance between points, and more, based on user-provided parameters.
- Financial Calculations: Endpoints for basic financial calculations like loan amortization, interest calculations, or investment growth projections based on user inputs.
- Data Filtering and Sorting: Functionality for filtering and sorting data according to specified criteria.
Deployment
As Dart developers writing backend code, we should focus on business logic. However, we need a server to run our code and leverage what we have written. To effectively deploy and manage backend applications written in Dart a server, developers must familiarize themselves with several key concepts and components.
Physical server
When deploying a Dart backend application, the first requirement is a physical server connected to the internet, capable of running your Dart HTTP server to handle requests and responses. While this direct approach is possible, using Virtual Machines (VMs) is a more common and practical solution for several reasons.
Virtual Machines (VMs)
VMs are software emulations of physical computers. They run on physical hardware but operate independently, allowing you to create multiple isolated environments on a single physical server. VMs use hypervisor software to allocate resources from the physical hardware. Each VM can have its operating system and run like a separate computer, making it versatile for different applications and services.
Deployment in a Single Region
When you rent a server or a VM, it is typically located within a single geographic region. This means your server or VM is hosted in a data center in a specific geographic area.
There are some implications for this approach:
- Latency: Users who are geographically close to the server’s region will experience lower latency, while those farther away might experience higher latency.
- Availability and Risk: Hosting in a single region can be simpler and more cost-effective, but it also poses a risk. Your service might become unavailable if the data center in that region faces issues like power outages or network problems.

Although this solution is still widely used for deployment, it has some limitations and requires knowledge of several technologies.
One common challenge with this approach is scaling to handle more requests. Two standard solutions are available:
- Vertical Scaling: Increasing the capacity of your existing server (like adding more RAM or a faster CPU).
- Horizontal Scaling: Adding more servers to your setup to handle increased demand.

When you choose horizontal scaling to deploy your Dart backend, it significantly increases your pipeline’s complexity. You will face several challenges, such as managing multiple server instances, ensuring efficient load distribution, and maintaining data consistency across servers. Each server must be aware of others with horizontal scaling, which requires robust service discovery and session management strategies.
Additionally, to dynamically adjust resources based on demand, you must implement auto-scaling, which involves setting up monitoring tools and defining scaling rules. While horizontal scaling offers benefits such as high availability and better handling of increased load, it also brings higher costs and the need for more sophisticated infrastructure management.
This approach demands careful planning and a deep understanding of your deployment environment’s technical and operational aspects.

It can be challenging to expand your services and make them available in multiple regions while managing network security, monitoring, and logs. These additional tasks add complexity to the process of managing your services.
Deployment Tools and Services
As mentioned in the previous chapter, a simple deployment request can quickly become a complex solution, especially if you focus solely on writing backend business logic and are not concerned with deployment.
Services and tools are designed to simplify and facilitate the deployment process, making it more efficient. Let’s take a look at the three common ways:
- Containerization Tools (like Docker):
- When writing and deploying your Dart backend in a VM, one of the problems you may encounter is the need to handle all OS patches and server updates. This can be costly and challenging in terms of both development and production. Different versions and environments required to run the software can also pose difficulties in maintenance and cost. These tools allow you to package your application and its environment into a container. Containers are lightweight and portable and provide a consistent environment for your application, regardless of where they are deployed. This means you can run your app similarly on your local machine, a VM, or the cloud. Other solutions, such as Podman, are available, but we won’t go into detail.
- Orchestration Tools (like Kubernetes): Managing multiple containers can become challenging as your deployment scales. Orchestration tools like Kubernetes help automate these containers’ deployment, scaling, and operation. They handle tasks like load balancing and resource allocation and ensure your application runs smoothly across all your containers.
- Cloud Providers (like AWS, Google Cloud, and Azure):
- These services offer a comprehensive range of options for hosting and managing applications. Cloud providers provide infrastructure (like servers and storage) and advanced monitoring, auto-scaling, and security services. They allow you to deploy your application in different regions worldwide, making achieving high availability easier and reducing latency for users globally.
- While this is great, it comes with a steep learning curve.
While you can directly deploy your backend to the server, it is more common to containerize your backend and then ship it, especially using one of the Cloud providers. Therefore, let’s skip direct deployment and look for containers. In this case, we use Docker and Google Cloud Platform (GCP) for deployment.
Deploying Your Dart Backend on Google Cloud Platform (GCP)
One of the simplest and oldest ways of deploying is to copy your source code to a virtual machine connected to the internet and then run your server.
You can use Google Compute Engine to create a Virtual Machine and run your backend server. Let’s see how we can do that.
Log in to your GCP account and create a new VM instance. https://console.cloud.google.com/

You first also need to select where this VM should be located. This starts with a single deployment region. Technically speaking:
- Region: A specific geographical area where you can host your resources. Each region is a separate geographic area that ensures data residency and compliance with local regulations. Regions are designed to be completely independent to achieve high availability. They are ideal for deploying applications that require resources to be located in a specific area.
- Zone: Within each region, there are multiple zones. A zone is a deployment area for cloud resources and is essentially a data center. Each zone is isolated from failures in other zones and provides redundancy and high availability within a region. Multiple zones within a region help protect your applications and data from zone-specific failures.
- A rule of thumb is if you want to go with a single region and zone, you should select the one that is the closest geographical to most of your users. For example, if you mainly serve Europeans, select the EU, or are mainly in the US, go for US-based regions.

Choose the appropriate machine type, OS, and region. The higher the resources, the more expensive the cost of the VM. Choosing the right resource is by itself a complex process. Many things can be involved.

Enable HTTP/HTTPS traffic in the firewall settings.

Once you are ready, create your VM and wait until it’s ready. It may take a few minutes.

Our next step is specifically for DartFrog, where you must build your application by running dart_frog build

Next, you can copy your source code from your machine using tools such as SCP or push to a git repo and pull in the VM. In GCP, you can also use SSH in Browser feature and upload your file there. So, in this case, you need to make a zip file of all of your files and upload it to the server.

Once you unzip your files, you have the source code and can run it, but the problem is having Dart installed on your VM. You can follow the dart.dev instruction to install Dart on Linux. Once you install Dart, you should also install dependencies within your build folder dart pub get

Finally, you are ready to run your server on default port 8080

Find your server IP from the GCP dashboard, and then you can see your APIs. http://{IP}:8080
This is just the beginning. Now it’s time for you to handle many other things, including:
- HTTPS
- Monitoring loads
- Next deployment management
- Version control and rollback
- Update and Patch OS, Dart SDK, and so on
- and many more…
As you can see, while this is the simplest approach, it can come with more efficiency.
To address the challenges in managing backend applications, containerization through Docker has become a popular solution. In the following steps, we will explore how Docker can improve the efficiency of this process and eliminate some of the problems mentioned.
Installing Docker
Before we continue, you need to have Docker installed. This could be either on your machine or the CI/CD process. Install it on your machine to demonstrate how the steps work with Docker.
Installing Docker is straightforward. Here’s a brief guide:
- Visit Docker’s Official Website: Go to Docker’s download page.
- Choose Your Platform: Docker is available for various platforms, including Windows, macOS, and Linux distributions. Select the version appropriate for your operating system.
- Download and Install:
- Download the Docker Desktop installer for Windows and macOS and follow the installation wizard.
- You’ll typically use your distribution package manager to install Docker for Linux. For example, on Ubuntu, you can use commands like
sudo apt-get updatefollowed bysudo apt-get install docker-ce.
- Verify Installation: After installation, open a terminal or command prompt and run
docker --versionto verify that Docker has been installed correctly. - Run Docker: On most systems, Docker will start automatically. On Linux, you should start the Docker service manually with a command like
sudo systemctl start docker. - Post-Installation Steps (optional for Linux users): Consider adding your user to the
dockergroup to run Docker commands withoutsudo. Usesudo usermod -aG docker your-usernameand restart your session.
These steps must also be done on the VM on which you will run Docker containers.
With Docker installed, you’re ready to build and run Docker containers for your applications, including your Dart backend.
Deploying Docker and VM in GCP
To deploy your Dart backend in a typical way, we’ll use Docker and Google Cloud Platform (GCP) for deployment. We’ll explore two approaches: deploying on a Virtual Machine (VM) and using Google Cloud Run.
Do not worry if you are not familiar with Docker and GCP services. This shows how many steps you must take to run your backend to handle requests.
Deploying on a GCP Virtual Machine
-
Create a Docker Image:
- Before creating the Docker Image, you should build your Dart Frog backend using
dart_frog buildcommand. It will create a build folder andbin/server.dartwhere it handles running your web server.
. ├── Dockerfile ├── README.md ├── analysis_options.yaml ├── build │ ├── Dockerfile │ ├── README.md │ ├── analysis_options.yaml │ ├── assets │ │ └── csv_example.csv │ ├── bin │ │ └── server.dart │ ├── helpers │ │ ├── error.dart │ │ └── logger.dart │ ├── middlewares │ │ └── cors.dart │ ├── pubspec.lock │ ├── pubspec.yaml │ └── routes- Now, Create a
Dockerfilein your project root.
# Use the official Dart image as a parent image FROM --platform=$BUILDPLATFORM dart:stable AS BUILDER # Set the working directory in the container WORKDIR /app # Copy the current directory contents into the container at /app COPY ./build . # Since we are building for multi architecture ARG TARGETPLATFORM # Resolve application dependencies RUN dart pub get # Build the application RUN dart compile exe bin/server.dart -o bin/server # Expose the port on which your app runs EXPOSE 8080 # Build a minimal serving image from AOT-compiled `/server` and required system # libraries and configuration files stored in `/runtime/` from the build stage. FROM scratch COPY --from=BUILDER /runtime/ / COPY --from=BUILDER /app/bin/server /app/bin/ # Run the compiled server CMD ["./app/bin/server"]- Build the Docker image:
- This is a bit tricky, as you have to create an image that supports multiple platform architectures. This is particularly important if you are building, for example, on an M1 Mac and you want to run this on a Windows or Linux machine.
- Use Docker Buildx for Building:
- Instead of the regular
docker buildcommand, use Docker Buildx to build your image for multiple architectures. Here are the steps for the first time if you are running:- Run
docker buildx create --name utility-backend --useThis command creates a new builder and switches to it. - Initialize the builder:
docker buildx inspect utility-backend --bootstrap. This command starts up the builder and prepares it for use. - Build for linux/amd64:
docker buildx build --platform linux/amd64 -t utility-backend:amd64 . --load - Build for linux/arm64v8:
docker buildx build --platform linux/arm64v8 -t utility-backend:arm64v8 . --load - Replace
utility-backendwith your desired image name and tag. - The
-platformflag specifies the target architectures (e.g.,linux/amd64,linux/arm64).
- Run
- Instead of the regular
- Please note that we’re utilizing the
dart compile execommand to compile a Dart program to a self-contained executable. - This approach helps minimize the docker’s size, which should be around 9MB. This is particularly helpful when you want to push and pull your image from or to a Registry. A registry is similar to a repository where you can host your docker image.
- Before creating the Docker Image, you should build your Dart Frog backend using
-
Set Up A Registry
- Generally, you need to store the Docker image you created in a registry that enables you to update or download it where you want. This is also helpful when sharing your image with someone else. Docker comes with a registry itself. However, in this example, I would like to set up a private one in GCP.
- Setting up a private registry in Google Cloud Platform (GCP) is a practical solution to store and manage your Docker images. GCP offers Container Registry, a private Docker image storage service that allows you to store and access your Docker images securely. Here’s how to set it up:
-
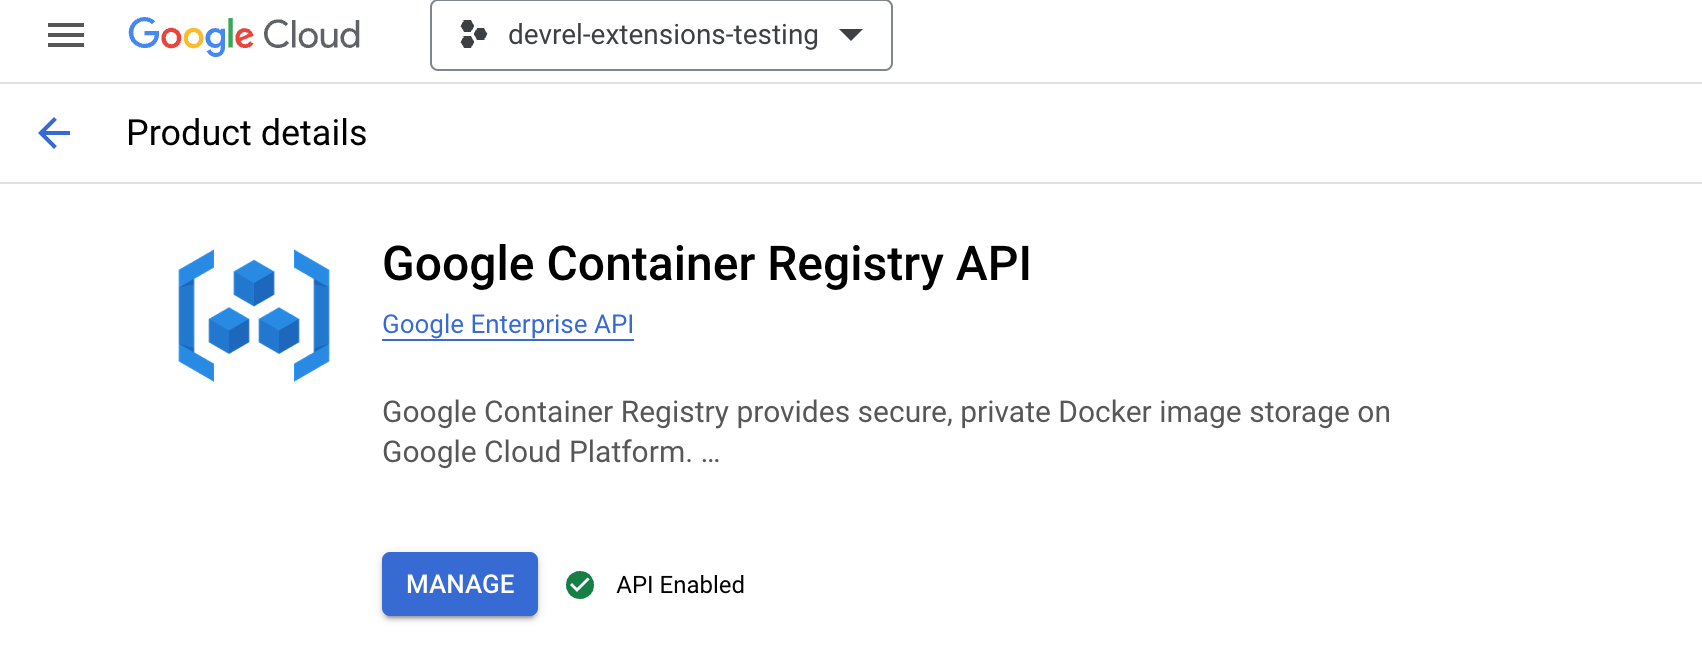
Enable the Container Registry API:
-
In your GCP Console, go to the APIs & Services dashboard.
-
Click on “Enable APIs and Services”.
-
Search for “Container Registry API” and enable it.
-
-
Configure Docker to Authenticate with GCP:
- Install and configure the Google Cloud SDK (
gcloudcommand-line tool). - Make sure you are login to the correct account
gcloud auth login - Authenticate Docker with your GCP account by running
gcloud auth configure-docker
- Install and configure the Google Cloud SDK (
-
Tag Your Docker Image:
- Tag your local Docker image with the registry name. The format is
gcr.io/[GCP-PROJECT-ID]/[IMAGE-NAME]:[TAG] - For example,
docker tag utility-backend:amd64 gcr.io/devrel-extensions-testing/utility-backend:amd64-v1
- Tag your local Docker image with the registry name. The format is
-
Push the Image to the Container Registry:
- Use the
docker pushcommand to upload your image to the registry. - For example,
docker push gcr.io/devrel-extensions-testing/utility-backend:amd64-v1
- Use the
-
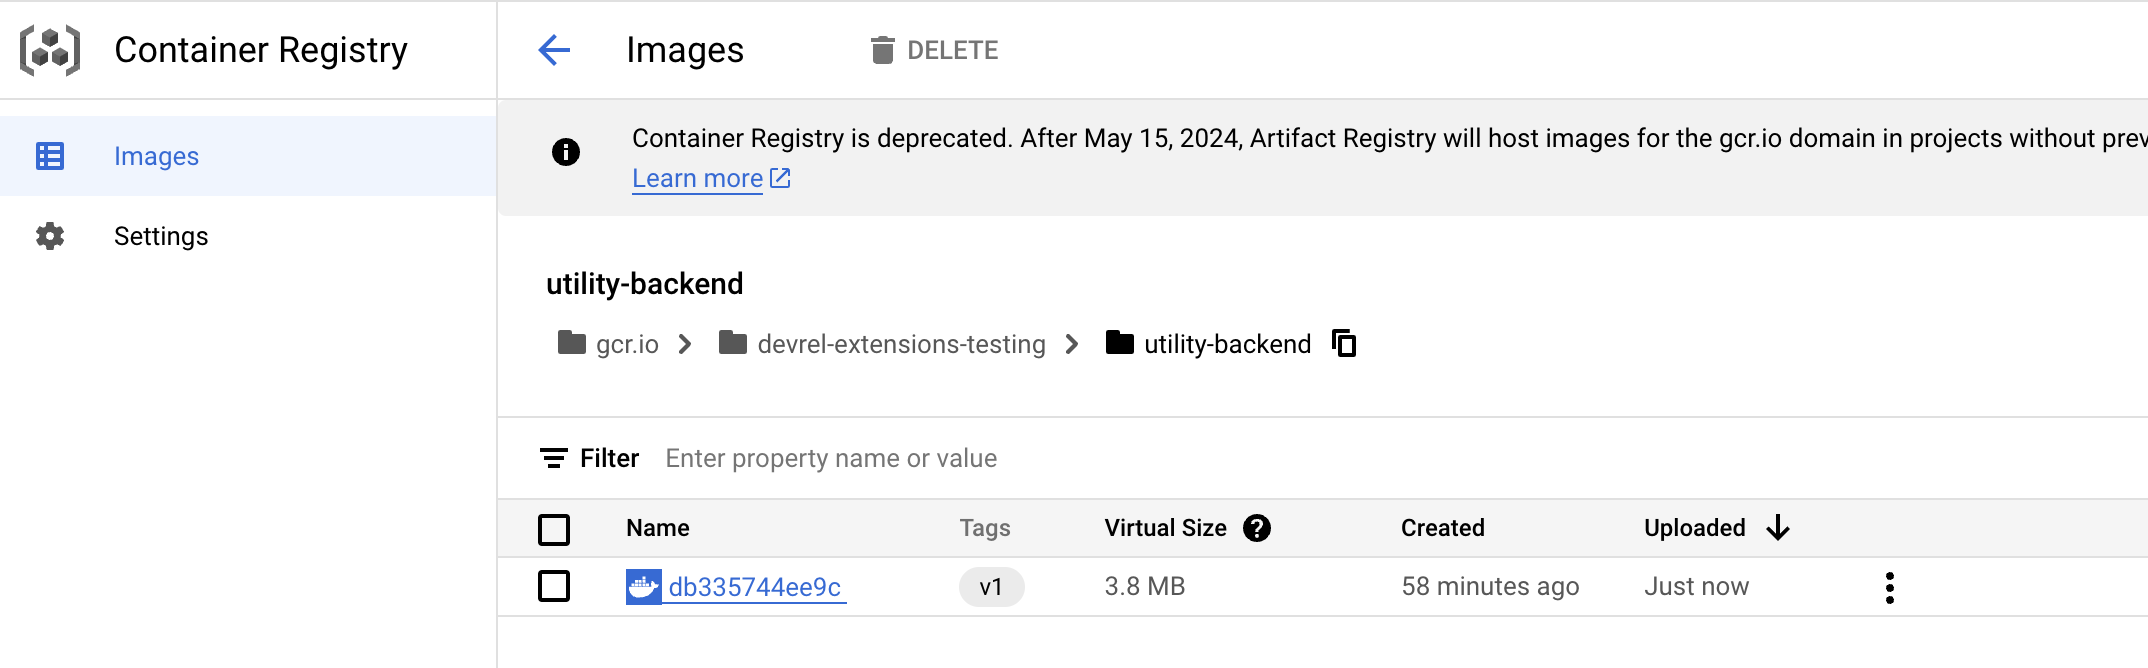
Verify the Image in the Container Registry:
-
Go to the GCP Console and navigate to the Container Registry.
-
You should see your Docker image listed there.
-
-
-
Deploy the Docker Image:
-
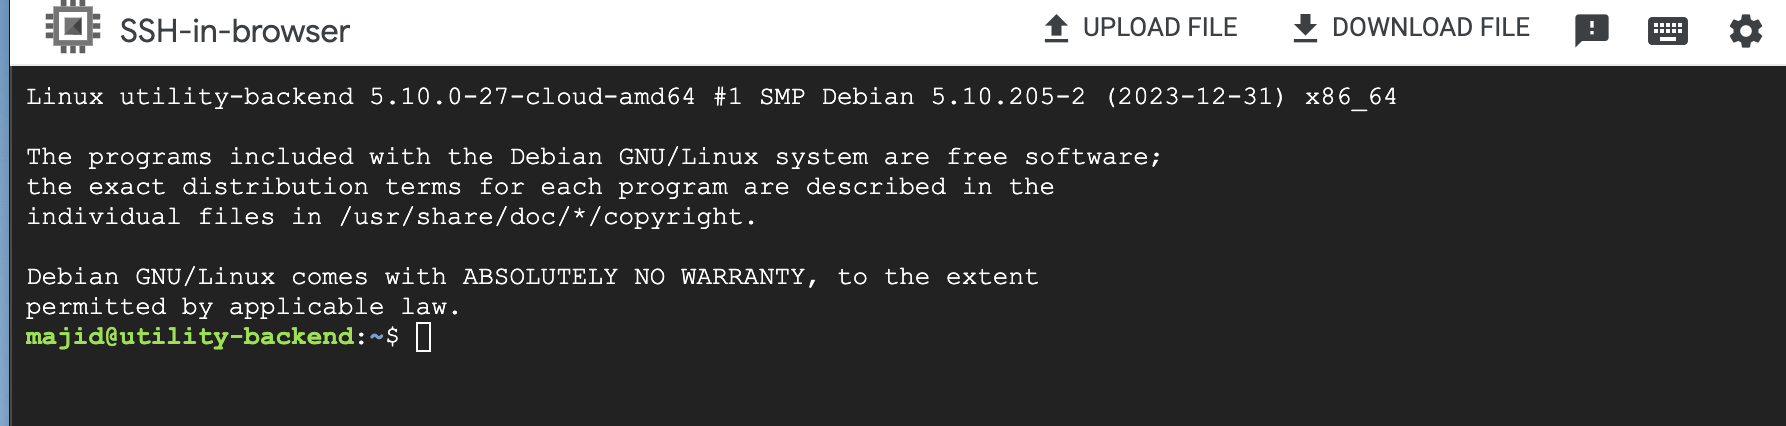
Connect to your VM via SSH. There are several ways to do this, but for this example, you can use SSH in the browser provided by GCP.
-
Install Docker on the VM if it still needs to be installed.
-
Run
sudo apt-get updateto update the package database. This command ensures you get the latest version of Docker and its dependencies. -
Install Docker for your OS. For example, for Ubuntu/Debian
sudo apt-get install docker.io -
Most Linux distributions use
systemdto manage services. Start Docker withsudo systemctl start docker -
Ensure Docker starts when the VM boots:
sudo systemctl enable docker -
To run Docker commands without
sudo, add your user to thedockergroup:sudo usermod -aG docker $USER
-
-
Transfer your Docker image to the VM or pull it from a registry.
- Ensure your VM has the necessary permissions to access the Google Container Registry. You should configure authentication for GCR using the Google Cloud SDK (
gcloud) on your VM. Here’s how to do it:-
Service Account for VM:
-
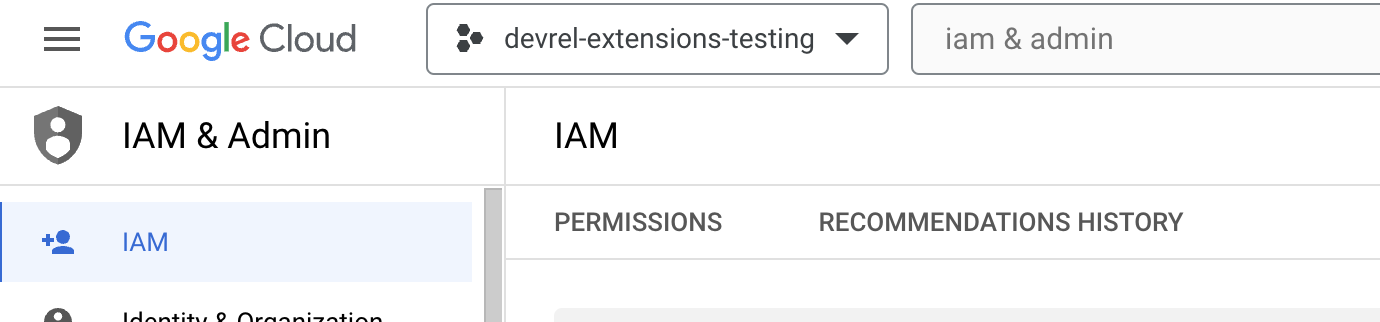
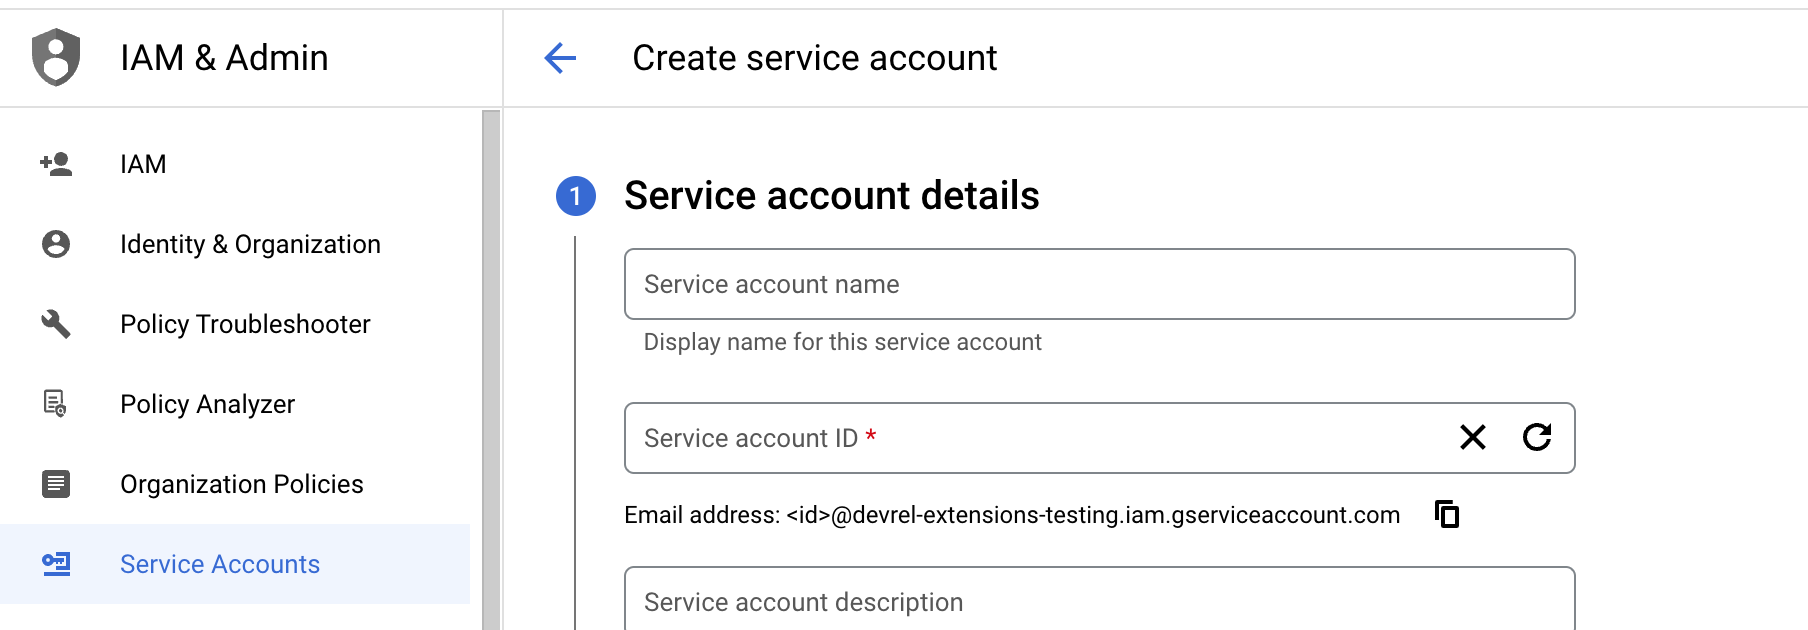
If you haven’t already, create a Google Cloud Service Account that the VM will use.
-
Go to the IAM & Admin page in your Google Cloud Console.
-
Create a new service account or select an existing one.
-
-
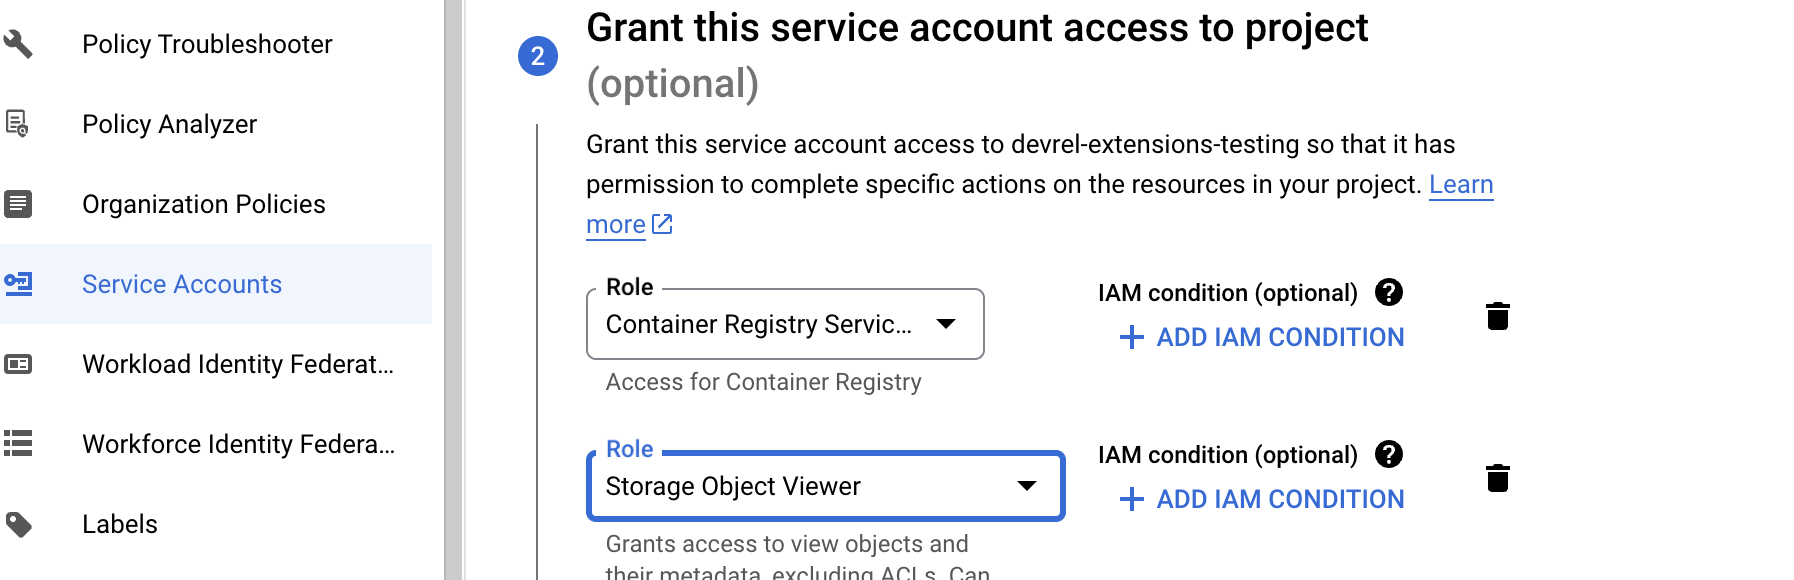
Assign Proper Roles:
-
Assign the service account a role that grants access to the Container Registry, such as “Storage Object Viewer” or a custom role with the required permissions.
-
These roles allow the service account to pull images from GCR.
-
-
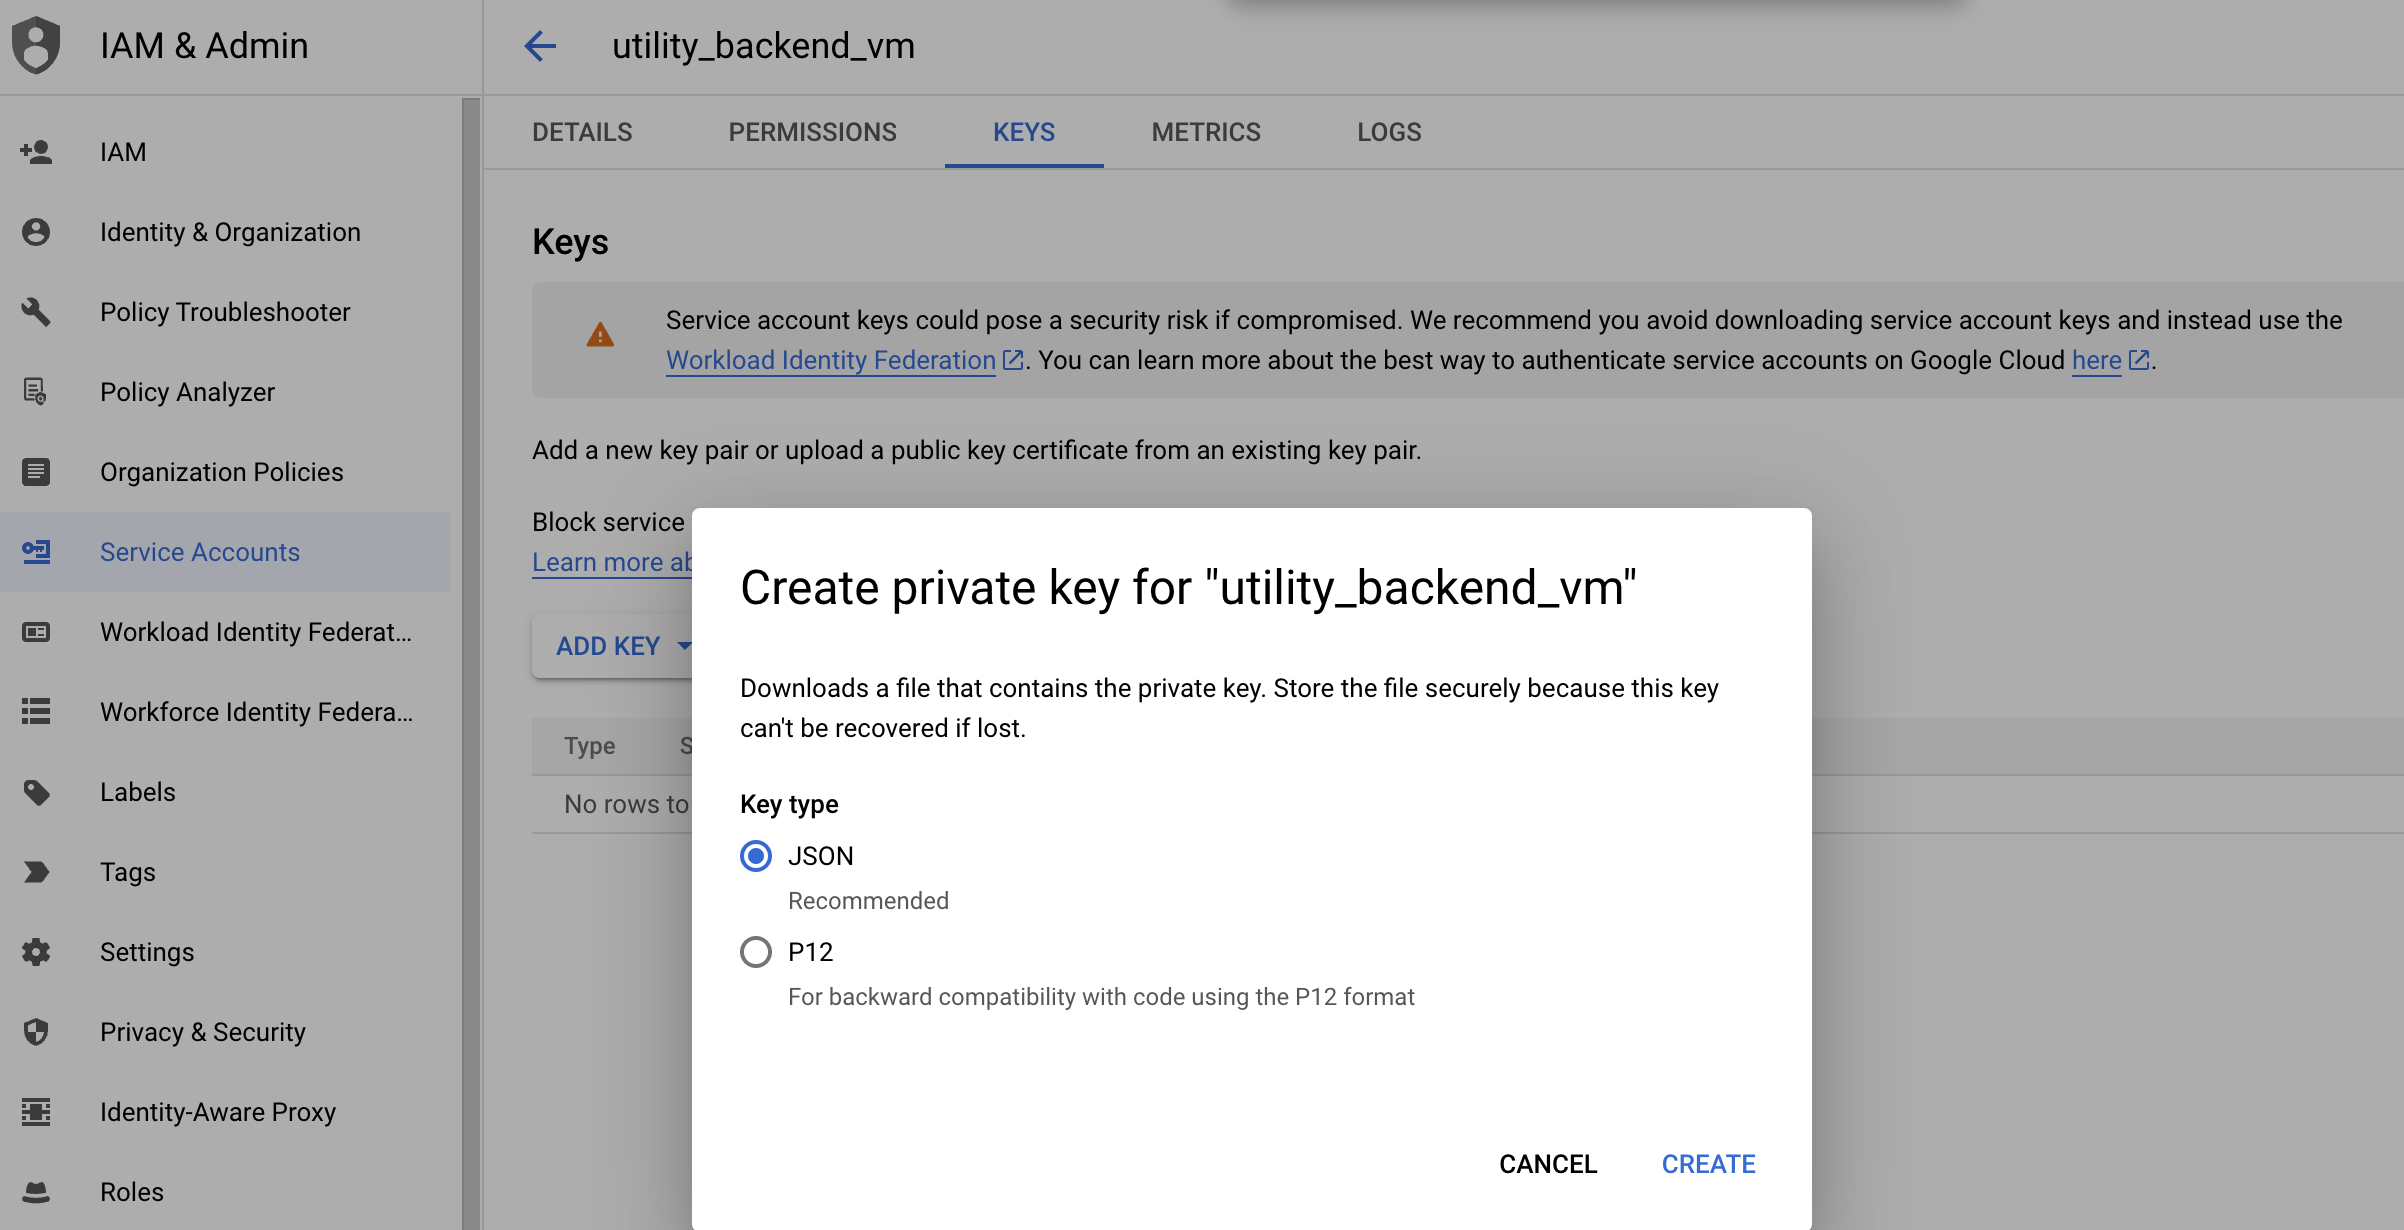
Create and Download a Key:
- Create a new JSON key for the service account.

- Download this key to your local machine.
-
Transfer the Key to the VM:
- Securely transfer the JSON key file to your VM using a method like
scp(Secure Copy), for example,scp path/to/keyfile.json username@vm-ip-address:/path/to/destination, or if you are using SSH in Browser from GCP, use the Upload file button.

- Securely transfer the JSON key file to your VM using a method like
-
Configure Docker on the VM:
-
SSH into your VM.
-
Configure Docker to use the service account key for authentication with GCR. Run:
gcloud auth activate-service-account --key-file=/path/to/destination/keyfile.json
-
Configure Docker to use
gcloudas a credential helper:gcloud auth configure-docker
-
-
Finally, GCR Access:
- Pulling an image from GCR to ensure the setup is correct:
docker pull gcr.io/devrel-extensions-testing/utility-backend:amd64-v1

- Since our OS is based on
amd64, should pull this image.

- You should be able to see the image now on your VM.

- Pulling an image from GCR to ensure the setup is correct:
-
- Ensure your VM has the necessary permissions to access the Google Container Registry. You should configure authentication for GCR using the Google Cloud SDK (
-
Run the Docker container:
docker run -d -p 80:8080 gcr.io/devrel-extensions-testing/utility-backend:amd64-v1
-
-
Access Your Application:
- Your Dart backend should now be accessible via the VM’s external IP address.


As you can see, this could be quite cumbersome to handle, especially at scale. Cloud providers usually have services that manage a computing platform that lets you run containers directly on a scalable infrastructure. Cloud Run is a simplified and easy-to-scale GCP service that still involves complexities. Let’s take a closer look.
Deploying on Google Cloud Run
Now that you have experienced and seen the complexity involved in matching virtual machines with and without containers, let’s explore another option that makes the first two steps a lot easier, especially in handling and managing the infrastructure.
-
Containerize Your Dart Application:
- As with the VM deployment, create a Docker image of your app. We will use the same docker image that we built for the previous steps.
-
Deploy to Cloud Run:
- Go to the Cloud Run section in your GCP console.

- Click “Create Service” and choose the recently pushed image from the Container Registry.
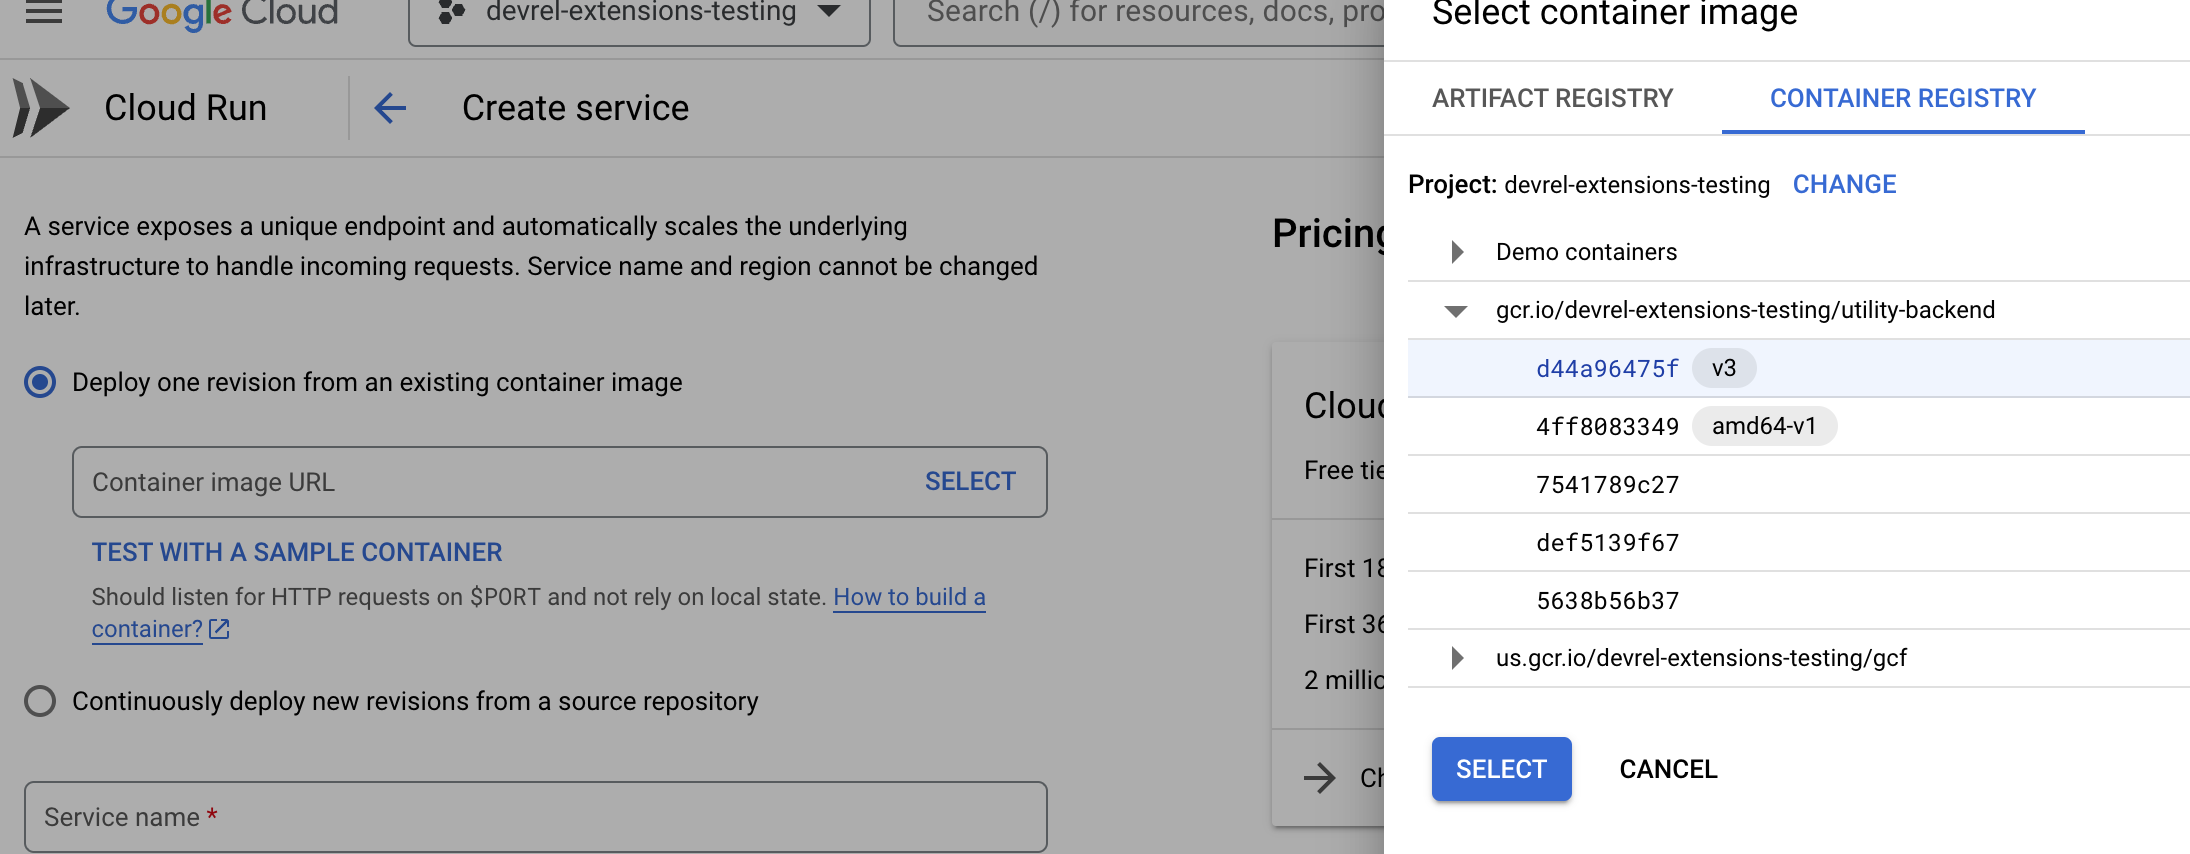
- Configure service settings like memory allocation, request timeout, and region, and then deploy the service. After a few seconds, you will see your service is running.
-
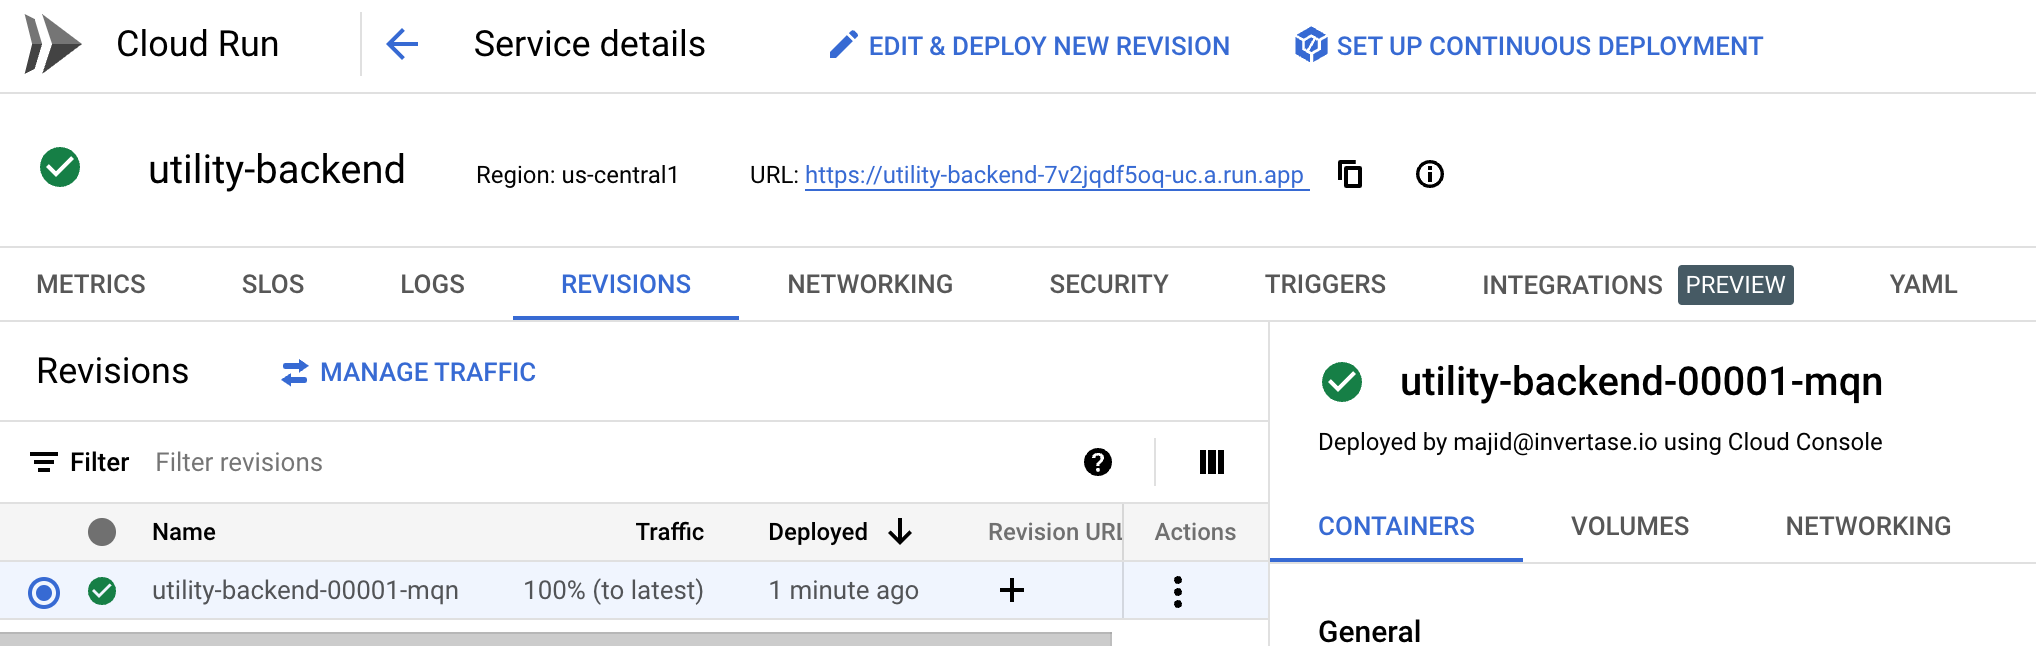
Access Your Application:
- Once deployed, Cloud Run will provide a URL to access your application. https://utility-backend-7v2jqdf5oq-uc.a.run.app/


As you can see, it still involves a few steps, and it knows it’s much easier to deploy to Cloud Run and let Google manage it. This approach is serverless, where Cloud Run manages scaling and infrastructure. However, you must still obtain certain knowledge to create and configure these services.
Stay tuned for another Serverless Architecture tutorial for Dart backends. I will deep dive into more details in another article.
Other Cloud providers:
For deploying your Dart backend on a VM or using a serverless platform like Cloud Run, the process we discussed for Google Cloud Platform can be adapted for other cloud providers with similar offerings. While the specific steps and interfaces might vary slightly, the core concepts remain the same. Here are some of the other major cloud providers where you can deploy your application using similar approaches:
- Amazon Web Services (AWS): For VM deployment, you can use Amazon EC2 instances, and for serverless, AWS offers services like AWS Fargate.
- Microsoft Azure: Azure Virtual Machines for VM-based deployment or Azure Container Instances for serverless deployment.
Each of these providers offers robust solutions for hosting and scaling applications, whether through traditional VMs or modern serverless platforms.
Dart backends and Microservices
While serverless platforms like Google Cloud Run offer a hassle-free way to handle the complexities of deployment and scaling, they come with limitations. Serverless solutions primarily focus on running your application without the need to manage the underlying infrastructure. However, they may need to provide more comprehensive tools for managing more complex aspects of your backend architecture.
A microservices architecture becomes relevant if your application requires breaking down into smaller, independent components. Microservices allow you to develop, deploy, and scale each part of your application separately. This approach is beneficial for complex applications where different components have varying requirements and load patterns. It enhances flexibility, makes maintenance easier, and can improve overall system resilience. However, it’s important to note that adopting a microservices architecture introduces challenges such as increased complexity in service communication and the need for more sophisticated orchestration and monitoring tools.
We have dedicated an article to the Microservice architecture for Dart backends, which will be published soon.
Dart backends and FaaS (Function as a Service)
Function as a Service (FaaS) is a cloud computing model that simplifies the development of serverless applications. In this model, developers write individual “functions,” which are small blocks of code designed to do a single task, such as responding to HTTP requests or database changes. These functions are executed in response to specific events, which can be anything from a user clicking a button to a data record being added to a queue. FaaS abstracts away the complexities of server management, scaling, and infrastructure maintenance, allowing developers to focus solely on their code’s logic.
While FaaS has been widely adopted for languages like JavaScript, Python, and Java, support for Dart is emerging. This integration means that Dart developers will soon be able to leverage the power and flexibility of FaaS platforms for their backends. Here are a few examples of FaaS services:
- Firebase Functions: As part of the Firebase platform, developers can run backend code responding to events triggered by Firebase features and HTTPS requests.
- AWS Lambda: Amazon’s FaaS offering, enabling you to run code in response to various events, such as HTTP requests via Amazon API Gateway, database changes, file uploads, etc.
- Azure Functions: Microsoft’s serverless compute service lets you run event-driven code without explicitly provisioning or managing infrastructure.
Integrating Dart with Functions-as-a-Service (FaaS) platforms will provide new opportunities for easily developing scalable and event-driven backend applications. This integration will enable Dart developers to concentrate more on writing code that delivers business value instead of managing servers and infrastructure. Stay tuned for further announcements and updates from these platforms regarding Dart support.
Globe: Simplifying Dart Backend Deployment
As you may have seen, deploying even a simple Dart backend involves complex steps, from configuring Docker and managing multi-architecture builds to handling permissions and roles in cloud platforms like GCP. For developers who want to focus more on their application logic rather than on the intricacies of deployment and infrastructure management, Globe offers a one-command solution.
Globe is a tool designed to simplify the deployment process, making it more accessible and less time-consuming. With Globe, you can deploy your Dart backend with just a few commands without detailed knowledge of Docker, cloud platforms, or server configurations and get your stateless Dart backend deployed worldwide powered by an edge network.
Here’s how you can get started with Globe:
-
Install Globe CLI: Globe provides a command-line interface (CLI) for easy interaction. To install it, run:
dart pub global activate globe_cliThis command installs the Globe CLI globally using Dart’s package manager.
-
Login to Globe: Once the Globe CLI is installed, authenticate with your Globe account:
globe loginFollow the prompts to log in. If you don’t have a Globe account, you’ll be guided to create one.
-
Deploy Your Application: Navigate to your Dart project directory.
Run:
globe deploy --prodFollow the on-screen instructions to deploy your Dart backend. Globe will guide you through configuring your deployment, including setting up environment variables, choosing a region, and more.
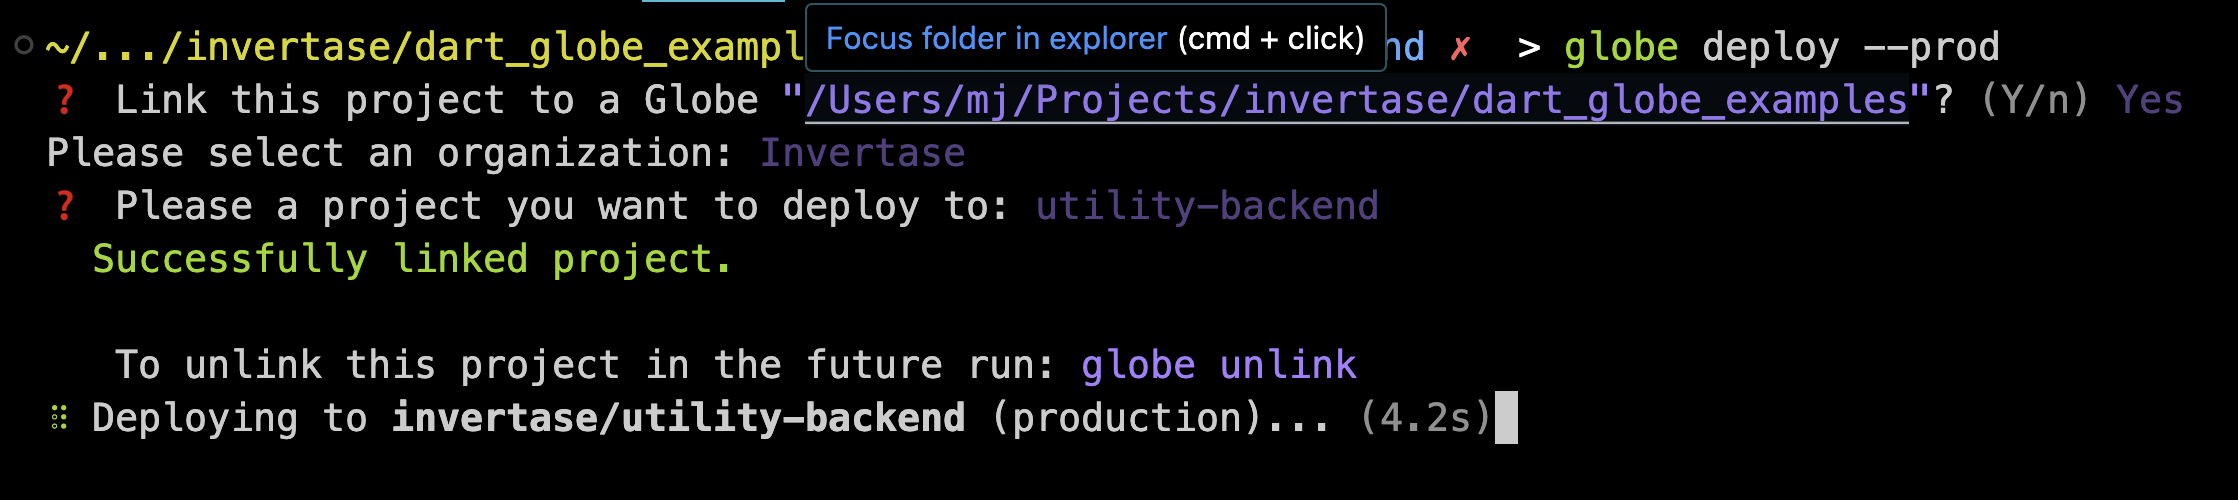
Once deployment is over, you will have access to your production link for example in my utility backend here is the link https://utility-backend.globeapp.dev/
-
Monitor and Manage Your Deployment: Globe provides tools to monitor and manage your application after deployment. If needed, you can easily view logs, update your deployment, or roll back to previous versions. Check the Globe Dashboard.

Globe also helps connect your GitHub repository and lets you deploy automatically by git push.

One of the useful features in Globe is the power to give you a preview link with each deployment or git push. You can test your feature before you deploy your application to production; you need to run globe deploy. This feature is much harder to achieve in the typical ways we explored in this article.

With Globe, deploying your Dart backend becomes a straightforward and hassle-free process. You can rapidly deploy, update, and manage your applications, allowing you to focus more on development and less on deployment complexities. Globe handles the underlying details, offering a user-friendly approach to deploying Dart backends in the cloud.
Flutter App
With our Dart backend now successfully deployed, the next step is to integrate it into our frontend. For this purpose, we have developed a Flutter application that interacts with the backend, providing a seamless user experience.
You can find both the source code and the final version of our Flutter front-end application at this link. This resource offers a comprehensive view of how the front end connects and communicates with the Dart backend, showcasing a real-world implementation of a full-stack application.
Conclusion
During our investigation, we have extensively covered the challenges involved in deploying a Dart backend. This includes setting up Docker and managing multi-architecture builds, as well as dealing with the complexities of cloud platforms and permissions. While these processes provide excellent control and flexibility, they require a considerable investment of time and knowledge of different deployment technologies.
Globe is a tool that simplifies deployment by encapsulating its complexities into a more manageable and user-friendly experience. It enables developers to concentrate on their core expertise, writing great code and building robust applications. With just a few commands, Globe streamlines the deployment process, making it accessible to developers of all levels of skill.
To sum up, although traditional deployment methods are still useful, tools like the Globe reflect the changing software development environment, where ease of use, efficiency, and automation are essential. Whether you are a seasoned developer or just starting, the capability to deploy applications quickly and easily is priceless in the rapidly moving world of software development.