4 Ways to deploy your Dart backend
 Majid HajianHead of Developer Relations & Community @Globe
Introduction
Dart’s versatility, performance, and rapidly growing ecosystem, especially for Flutter developers, make it a powerful choice for creating backend applications. You have various options when it’s time to deploy your Dart backend.
Let’s discover some standard methods and examine when to use each.
Virtual Machines (VMs)
Virtual machines emulate physical hardware, offering complete control over your environment. Setting up and maintaining a VM gives you granular control of:
- OS selection (Linux, Windows, etc.)
- Software stack (specific database versions, web server, etc.)
- Network configuration
This way is still popular among backend developers as it is ideal for complex applications needing maximum customization or strict dependency requirements, and it gives full control from the OS level. However, it comes with maintenance and management overhead.
Many providers can give you VMs, such as AWS EC2, Google Compute Engine, DigitalOcean, and Azure Virtual Machines, if you want to use Cloud Computing technologies or any other service providers such as VPS server or similar that have managed to have better pricing for VMs.
Popular Linux distributions like Ubuntu or CentOS are common choices for Dart backend VMs.
Understanding the Trade-offs of VMs
While VMs grant you maximum control over your server environment, there are complexities to remember. Scaling your application with VMs is more relaxed than with other solutions.
If you anticipate your app needing to handle sudden spikes in traffic, you’ll need to manually add more VMs or upgrade the resources of existing ones. This can sometimes cause downtime. Additionally, carefully consider your application’s needs in terms of processing power (CPU), memory (RAM), storage space, and network speed to choose the right VM configuration.
Lastly, VMs require greater responsibility from you regarding ongoing maintenance, like software updates, security patches, and backups.
Scaling Strategies for Dart Backends on VMs
We just talked about scaling as one of the complexities. Let’s explore more on this subject. When your Dart backend application on a VM experiences increased demand, here are your primary scaling strategies:
-
Vertical Scaling: Upgrading the resources of your existing VM. This means allocating more CPU cores, RAM, or faster storage. This is relatively simple to implement and good for predictable, gradual growth. However, it often incurs downtime during upgrades. The maximum hardware capacity of a single VM also limits you.
-
Horizontal Scaling: Adding more VMs to share the workload, spreading incoming requests across multiple machines. This requires a load balancer to distribute traffic intelligently. It enables greater scalability potential, as you can keep adding more VMs. Improves fault tolerance if one VM goes down. However, it Increased architectural complexity. You’ll need to configure and manage the load balancer and ensure your application gracefully handles multiple instances. It’s important to note that this scaling often can happen if your application doesn’t hold state. A stateful application is often harder to scale horizontally. For example, imagine a database on a server.
-
Hybrid Approaches: You can combine vertical and horizontal scaling for flexibility. For example, moderately upgrade individual VMs (vertical scaling) while utilizing a load balancer to manage a few (but not excessive) instances (horizontal scaling).


You would need to consider many other things when it comes to scaling and maintaining your backend with this approach, such as:
- Data Storage: Scaling the backend necessitates also thinking about your database strategy. Are you using a database within the VM itself? Consider replication (read replicas) or more powerful dedicated database solutions.
- Caching: Employ in-memory caching mechanisms like Redis or Memcached to reduce unnecessary requests to the database and improve application responsiveness.
- Monitoring: Proactively monitor your VMs’ resource usage (CPU, RAM, disk I/O). Set up alerts to identify bottlenecks and trigger scaling actions before issues impact users.
While manual scaling decisions are often required with VMs, automatic scaling features, more common in containerized or serverless environments, must be set up with custom scripts or additional tooling, especially if you use cloud providers’ services. This often comes with many features that they provide you to scale up and down quickly.
Step-by-Step Deployment of a Dart Backend to VM
In this tutorial, we are using Google Cloud Provider to create a VM instance. However, you are not limited to any provider, and as soon as you decide where you have a VM, you can continue transferring your backend to your VM.
Let’s get started.
- Create a GCP Project: If you haven’t already, create a new one to house your VM instance.
- Create a VM Instance:
-
Navigate to the Compute Engine section of the GCP console.
-
Click “Create Instance.”
-
Select a suitable machine type (consider your CPU and RAM needs).
-
Choose a Linux distribution as your operating system (Ubuntu or Debian are good options for Dart).
-
Configure Networking: Ensure firewall rules allow incoming traffic on the port(s) your Dart application uses. Make sure you check HTTP and HTTPS traffic for your server.
-
Click “Create” to initialize your VM instance.
If you are using another provider, you may have a different way of creating an instance. However, the rest of the steps remain the same for deploying your backend.
-
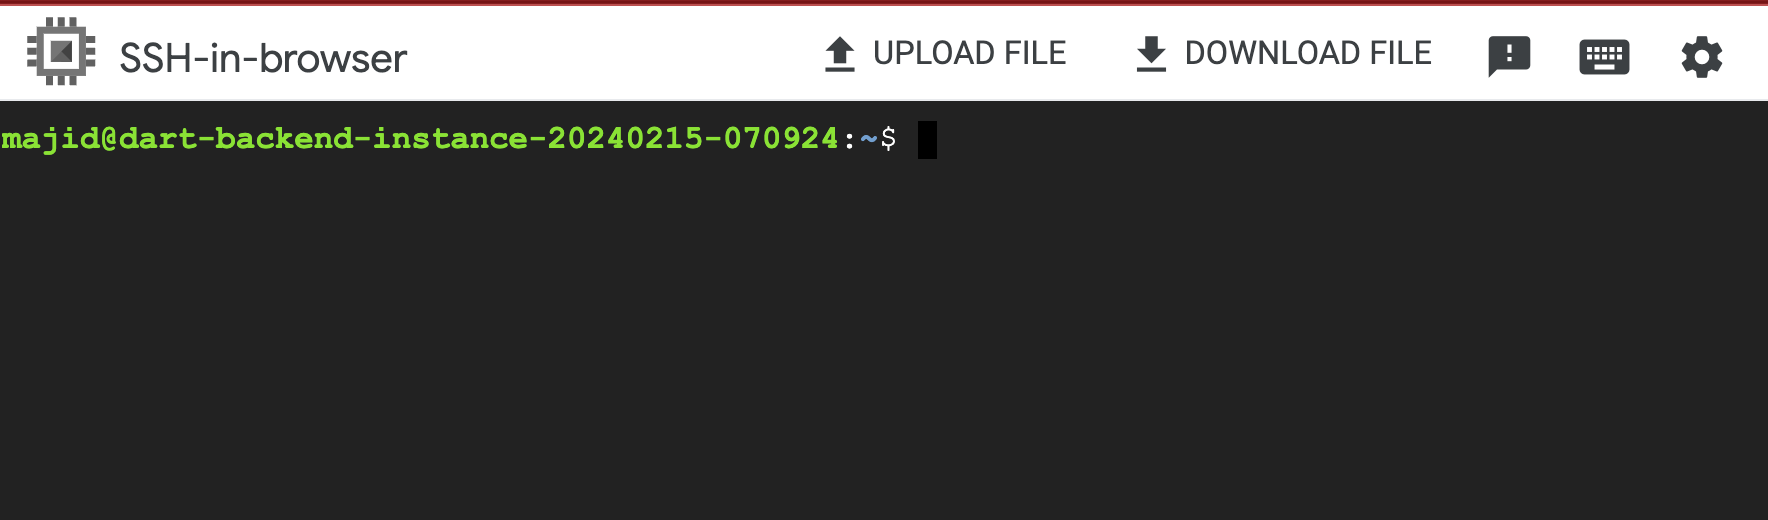
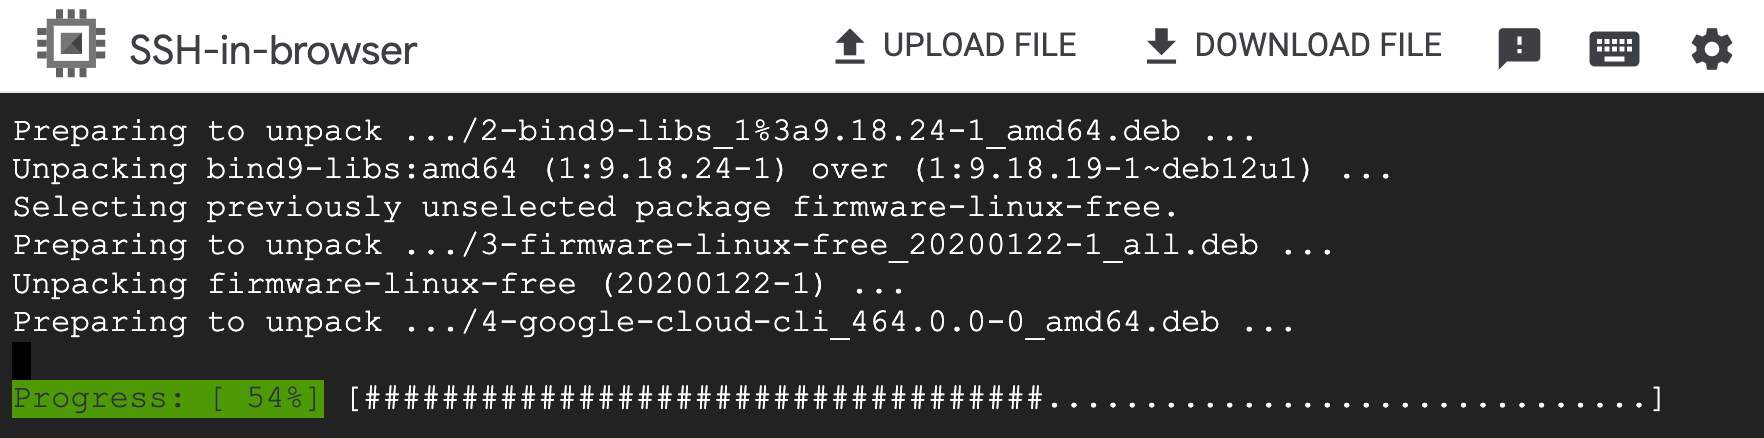
Connect to Your VM: GCP provides ways to connect via SSH in the browser or from your terminal using command-line tools.
-
Prepare the VM Environment:
-
Update the OS:
sudo apt update && sudo apt upgrade(or equivalent for your chosen Linux distribution) -
Install Dart Runtime: Follow the official Dart installation instructions for your selected Linux distribution (https://dart.dev/get-dart).
-
-
Transfer Your Application: Use a secure file transfer protocol (SFTP) client (like FileZilla, WinSCP, or command-line
scp) to upload your Dart application code to the VM. Using a browser terminal in GCP also gives Upload File options to upload your entire backend as a Zip file directly. However, having a proper command to make things more automated, such as usingscp, is optimal. -
Install Dependencies: Navigate to your application’s directory within the SSH session on your VM. Run
dart pub getto fetch your Dart project’s dependencies. -
Build Your Application (If Required): Use
dart compile exeto create an executable binary if your Dart application requires compilation. -
Start Your Application: Now you can directly execute your application:
./your_application_executable. Also, consider usingnohuporsystemto keep your application running after you close the SSH session. -
Test: Find your VM’s external IP address in the GCP console and access your application via this IP and the appropriate port in your browser (e.g.,
http://[your-vm-ip]:8080if your application listens on port 8080). You can check your port in your backend server.


There are ways that you can automate and deploy your changes automatically; however, as you can see, it comes with extra steps that might be challenging to maintain if you are a small team, especially if you have multiple environments.
Let’s look at another alternative that might be easier to manage.
Containers
Containers work like lightweight packages encapsulating your entire Dart backend application, including its code, the Dart runtime, and any libraries or dependencies. This self-contained package becomes highly portable, running consistently across environments like your local machine, development servers, and various cloud platforms.
Containers offer a fantastic way to help deployment and create consistent environments for your Dart backend. At the heart of the container world lies Docker, the most well-known player. Docker provides a user-friendly way to define container images with Dockerfiles, build those images, and manage running containers. The Docker ecosystem and container registries for storing and sharing images make the process remarkably smooth.
While Docker is extremely widely used, it’s worth noting that alternatives are emerging. One prominent example is Podman. Podman shares many similarities with Docker regarding core functionality, such as creating images and running containers. However, Podman takes a different architectural approach— it’s designed to be daemonless, which means it doesn’t run a long background process like Docker. Some consider this a potential security advantage, simplifying the toolchain to some degree. Podman has increasing compatibility with Docker concepts, easing potential transitions.
Containerize Your Dart Backend
This guide will walk you through containerizing your Dart application using Docker and Podman.
Prerequisites
- Docker: Install Docker on your system. Visit the official Docker installation guides: https://docs.docker.com/get-docker/
- Podman: Install Podman on your system. Refer to the official Podman installation guides: https://podman.io/getting-started/installation
- A Dart Backend Project: An existing Dart backend project ready to containerize.
Steps (Docker)
-
Craft Your Dockerfile: Within your project’s root directory, create a
Dockerfile:FROM dart:stable AS build # Resolve app dependencies. WORKDIR /app COPY pubspec.* ./ RUN dart pub get # Copy app source code and AOT compile it. COPY . . # Ensure packages are still up-to-date if anything has changed RUN dart pub get --offline RUN dart compile exe bin/server.dart -o bin/server # Build a minimal serving image from AOT-compiled `/server` and required system # libraries and configuration files stored in `/runtime/` from the build stage. FROM scratch COPY --from=build /runtime/ / COPY --from=build /app/bin/server /app/bin/ # Start server. EXPOSE 8080 CMD ["/app/bin/server"]
Let’s break down your Dockerfile step by step:
FROM dart:stable AS build- Base Image: This line selects the official
dart:stableDocker image as the foundation for our build process. This image provides the Dart runtime and toolchain to compile and manage your Dart application. - Multi-stage Naming: Importantly, it adds the
AS buildclause, defining a named stage. This lets us utilize a larger image with tools and move the compiled parts into a smaller final image.
- Base Image: This line selects the official
WORKDIR /appSets Working Directory establishes/appwithin the image as the active directory for subsequent commands.COPY pubspec.* ./This stage-specific action copies yourpubspec.yamlandpubspec.lockfiles into the/appdirectory. This early copy lets Docker cache these layers, enhancing efficiency in later builds if only your code changes.RUN dart pub getThis executes the Dart package manager to download and install the dependencies declared in your project’spubspec.yamlfile.COPY . .Now, Docker copies the rest of your Dart backend source code files into the/appworking directory inside the image.RUN dart pub get --offlineEnsures any added dependencies since the initial copy can be pulled for your final, compiled image without requiring external download during a build.RUN dart compile exe bin/server.dart -o bin/serverThis crucial step uses the Dart compiler to perform Ahead-of-Time (AOT) compilation. It produces a single, self-contained executable binary within the image at/app/bin/server. AOT improves startup time and sometimes overall performance.FROM scratchThis transitions to a new image starting from ‘scratch’. This means this next stage starts without a base OS, keeping the final image extremely tiny.COPY --from=build /runtime/ /Selective Dependencies:-from=buildreferences the earlier stage. With this command, Docker copies essential runtime libraries and configuration files your now-compiled Dart binary needs to/at the root of the new image.COPY --from=build /app/bin/server /app/bin/Brings the AOT-compiledserverbinary to the current image and places it in the/app/bindirectory.EXPOSE 8080Informs that the containerized Dart backend will listen on port 8080; you can change the port if you wish, but make sure the selected port is not busy.CMD ["/app/bin/server"]Specifies the command to run when a container based on this image is started. It executes your AOT-compiled Dart server.
-
Build the Image: Open a terminal in your project directory and run:
docker build -t my-dart-backend . -
Launch Your Container: Start your Dart backend within a container:
docker run -d -p 8080:8080 my-dart-backend -
Test: In your browser, go to
http://localhost:8080to access your Dart backend.
While ‘raw’ Docker commands are powerful for handling single containers, things get messier when your project has multiple components (e.g., a Dart backend and a database). Docker Compose uses a YAML file (often named docker-compose.yml) to address this with a declarative approach. Within this file, you:
- Define Services: Each service (your Dart backend container, a database container, etc.) gets its configuration block.
- Set Up Networks: Docker Compose makes it easy for your containers to communicate within a private, internal network you create.
- Manage Dependencies: Clearly express which services depend on each other, ensuring proper startup and shutdown orderings.
Instead of tediously running individual docker run commands, you use docker compose up to spin up your entire backend environment. Changes? Adjust the file and run docker compose up again with changes applied automatically.
- Organized Structure: Your
docker-compose.ymlbecomes a clean blueprint of your application’s components and how they interconnect. This improves clarity and collaboration. - Isolation with Shared Context: Containers operate independently but can network. Your backend easily talks to its designated database without exposing that database to the outside world unnecessarily.
Sample docker-compose.yml (Building on your Dockerfile)
Let’s keep Dockerfile as is, a basic docker-compose.yml for your Dart backend might look like this:
services:
  my-dart-backend:
    build: .  # Path to your Dockerfile
    ports:
      - "8080:8080"  # Map ports from host to container
    # Optional (if you need volumes for persisting application data)
    # volumes:
    #   - ./backend-data:/app/data
We will have the Dockerfile and the docker-compose yaml file next to each other, then from the project directory, we can run docker-compose up -d (-d runs everything detached in the background).
That’s it; now you can define multiple docker fields and services and run them all by one command; this is particularly easier to manage in a development environment.
Steps (Podman)
While Docker is dominant, you can still use alternatives such as Podman. Let’s have a quick overview of it as Podman is a drop-in replacement for docker and is supposed to be easy to convert a docker project to Podman.
-
Dockerfile (Remains the Same): The awesome part is that Dockerfiles are cross-compatible!
-
Build the Image:
podman build -t my-dart-backend . -
Launch Your Container:
podman run -d -p 8080:8080 my-dart-backend -
Testing (Like with Docker)
That’s it! I encourage you to take a look at the alternatives, as software engineers always should have backend plans and expand their breadth of knowledge.
Deploying Containers
Now that your Dart backend is safely packaged within a container, a world of deployment options awaits! Your selection depends on your project’s scale, complexity, and team preferences. Here are key concepts and strategies to consider:
The Container Image Registry
Think of a container registry as a library for your container images. Similar to the code you store in a repository, your images can be stored in a registry. Popular registries include:
- Docker Hub: The public registry for sharing Docker images.
- Cloud-based Registries: AWS ECR, Google Container Registry, and Azure Container Registry offer tight integration with their respective cloud platforms.
After building your Docker image, you’ll use the docker push command to upload it to your chosen registry.
Deployment Targets
- Single Server with SSH: You might have a single server (often a VM) for simpler setups. Utilize
docker pullvia an SSH session to bring your image onto the server, and thendocker runto start the container. However, this is best for testing and basic scenarios. - Container Orchestration Platforms:
- Kubernetes: The industry leader for managing complex containerized workloads. Kubernetes handles automated deployments, scaling, and networking between containers and provides self-healing features.
- Swarm: Simplifies container orchestration, ideal for teams who appreciate its relative ease of use compared to Kubernetes.
- Cloud-based Container Services:
- AWS ECS, Google Cloud Run, and Azure Container Instances cover the infrastructure for your running containers. Cloud providers offer seamless integration with load balancing, storage, and additional services.
Automating the Workflow (CI/CD)
Continuous Integration/Continuous Deployment (CI/CD) pipelines bring a structured approach to deploying your Dart backend. CI/CD automates the steps of:
- Building your image when code changes occur.
- Pushing the new image to your registry.
- Triggering automatic deployment updates onto your target environment.
Google Cloud Run & Serverless
Google Cloud Run is a fully managed serverless platform designed to run your applications within containers. Imagine it as a service that handles all the underlying servers and infrastructure, allowing you to focus purely on your application’s code. You provide your container image, and Cloud Run takes care of scaling, automatic provisioning, and managing the resources to execute your container in response to incoming requests.
Let’s explore a step-by-step guide for deploying your containerized Dart backend to Google Cloud Run.
Prerequisites
- Google Cloud Project: Set up a Google Cloud Platform (GCP) project.
- Dockerized Dart Backend: A Dockerfile ready to build the container image of your Dart backend, as we already have done in the tutorial.
- Google Cloud SDK: Install the
gcloudcommand-line tool (https://cloud.google.com/sdk/docs/install). This is used to interact with GCP services.
Step-by-Step Guide
- Authenticate with Google Cloud: Ensure you are logged in using the gcloud CLI:
gcloud auth login
- Select the Project: Set your active GCP project:
gcloud config set project [YOUR-PROJECT-ID]
- Build and Push Your Docker Image to Google Container Registry (GCR):
# Build the image
docker build -t gcr.io/[YOUR-PROJECT-ID]/my-dart-backend:latest .

# Push to GCR
docker push gcr.io/[YOUR-PROJECT-ID]/my-dart-backend:latest
- Deploy to Cloud Run
gcloud run deploy --image gcr.io/[YOUR-PROJECT-ID]/my-dart-backend:latest --platform managed --region us-central1 --allow-unauthenticated
- Optionally change
us-central1to your desired region. -allow-unauthenticatedis for quick testing. Replace this with proper authentication mechanisms for production environments.- If needed, use the
--set-env-varsflag in thegcloud run deploycommand to configure your backend.
-
Access Your Backend:
Cloud Run will assign a URL to your deployed service. The
gcloud run deploycommand’s output provides this. Access this URL in your browser to reach your Dart backend.
Nice, just a few steps, and now you have your Dart backend running on a fully serverless and managed service by Google. You can follow the same approach on other cloud providers, too. We will publish separate tutorials to show how to leverage other cloud providers with containers, but the main concept remains the same.
While this is great, it gets more complex when you have multiple services and need to connect, such as a database, cache layer, etc. Let’s move on to the next solution, which might be easier for some use cases and fits well for some projects.
Platform as a Service (PaaS)
Another approach to deploy your backend is PaaS. Think of PaaS as a cloud-based environment tailored for running applications. PaaS providers handle the infrastructure layer (servers, operating systems, networking), along with critical parts of your application stack, such as:
- Databases
- Middleware (e.g., message queues)
- Deployment tools
- Monitoring and logging systems
With PaaS, you’re less burdened by infrastructure management and more focused on developing and deploying your Dart backend application. There are several advantages of PaaS for Dart Backends:
- Faster Development Cycles: PaaS helps set up and provides ready-to-use components, speeding up the time from initial coding to live deployment of your Dart app.
- Simplified Scalability: PaaS platforms typically handle scaling up or down based on traffic demand. Your Dart backend can cope with sudden spikes of usage without manual intervention on your part.
- Reduced Operational Overhead: The PaaS provider manages updates, security patching, and much of the day-to-day upkeep of the underlying systems. This lowers your administrative burden.
- Geographic Distribution: Many PaaS offerings let you deploy instances of your Dart application in various regions globally. This improves performance for end-users by distributing your backend closer to them.
- Pay-As-You-Go: Often, PaaS pricing models align well with usage patterns. You might pay based on resource consumption or a subscription plan, avoiding expensive investments in dedicated servers.
There are several popular PaaS solutions that you can leverage for your next Dart backend.
- Heroku: One of the pioneers of PaaS, known for ease of use with broad language support, including Dart.
- Google App Engine: Google’s mature PaaS solution. It is tightly integrated with other Google Cloud services and boasts robust scaling capabilities.
- AWS Elastic Beanstalk: A flexible PaaS option from Amazon Web Services that handles deployment and infrastructure, giving you additional customization control.
- Render: Newer provider gaining popularity. Excellent developer experience and integrated database/CDN services.
The good thing about these services is that you can use Dart as a language or a Custom Docker build. PaaS shines when you want to prioritize rapid development and help the deployment of your Dart backend and prefer less hands-on involvement with infrastructure management than managing your VMs.
Since we have used GCP so far in this tutorial, let’s take Google App Engine as our example for deployment.
We assume you already have the following prerequisites as we have seen in the previous section:
- A Google Cloud Project
- Your Dart backend is containerized and pushed to a container registry (see earlier instructions on Google Container Registry).
- Google Cloud SDK installed.
- You also need to enable the App Engine API https://cloud.google.com/build/docs/deploying-builds/deploy-appengine
Step by Step guides:
- Authenticate with Google Cloud: Ensure you are logged in using the gcloud CLI:
gcloud auth login
- Select the Project: Set your active GCP project:
gcloud config set project [YOUR-PROJECT-ID]
- Build and Push Your Docker Image to Google Container Registry (GCR):
# Build the image
docker build -t gcr.io/[YOUR-PROJECT-ID]/my-dart-backend:latest .

# Push to GCR
docker push gcr.io/[YOUR-PROJECT-ID]/my-dart-backend:latest
- Create an
app.yamlfile in your Dart project directory.
runtime: custom
env: flex

automatic_scaling:
  target_cpu_utilization: 0.65
  min_instances: 1
  max_instances: 10

resources:
  cpu: 0.5
  memory_gb: 2.3
  disk_size_gb: 10
Let’s break down each section:
runtime: customandenv: flex:- Specifies that you are using a custom runtime for your application and deploying to the flexible environment of App Engine. You can use custom Docker containers to run your application in the flexible environment.
automatic_scaling:- Configures automatic scaling for your application based on certain criteria.
target_cpu_utilization: 0.65: Sets the target CPU utilization to 65%. App Engine will automatically adjust the number of instances to maintain this CPU utilization level.min_instances: 1: Specifies the minimum number of instances that should be running, even during periods of low traffic.max_instances: 10: Specifies the maximum number of instances that can be created to handle increased traffic.
resources:- Configures the allocated resources for each instance of your application.
cpu: 0.5: Specifies that each instance should be allocated 0.5 virtual CPU cores.memory_gb: 2.3: Allocates 2.3 gigabytes of memory to each instance.disk_size_gb: 10: Sets the disk size allocated to each instance to 10 gigabytes.
- For more information, read the reference App Engine documentation on Google Cloud
- Deploy your Dart app to App Engine using the Docker image from GCR:
gcloud app deploy
Follow the prompts to select your project and confirm the deployment.
- Once the deployment is complete, you can access your Dart app using the provided App Engine URL.
Google App Engine is just one example that we have explored. Choosing the right deployment option depends on application architecture, scalability needs, and developer preferences.
Also, always consider an automated deployment pipeline in your CD/CI, which makes it seamlessly deliver new features to your clients. We will have more in-depth tutorials on how to automate your Dart backend. Remember to subscribe to your newsletter for the latest tutorial in your inbox.
Globe.dev Deployment
Global.dev is a deployment platform specifically designed to help the process of developing and deploying Dart and Flutter applications. With a focus on simplicity and automation, Global.dev is an attractive option for developers seeking a developer-friendly experience—the key features of Globe.dev are:
- Dart-Centric Optimization: The platform tailors configurations for optimal performance when running Dart backends.
- Edge network: Built on top of the Edge network where you can have the lowest latency closest to your customer request.
- Effortless Continuous Deployment: Integration with Git repositories allows seamless deployment whenever you push code updates with revert, preview, and many more features in place.
If you’re building Dart and Flutter applications, Global.dev caters to your tech stack. It minimizes infrastructure management and deployment complexities, enabling you to focus intensely on developing your application’s core features and user experience instead of fiddling with DevOps workflows.
Here’s how you can get started with Globe:
-
Install Globe CLI: Globe provides a command-line interface (CLI) for easy interaction. To install it, run:
dart pub global activate globe_cliThis command installs the Globe CLI globally using Dart’s package manager.
-
Login to Globe: Once the Globe CLI is installed, authenticate with your Globe account:
globe loginFollow the prompts to log in. If you don’t have a Globe account, you’ll be guided to create one.
-
Deploy Your Application: Navigate to your Dart project directory.
Run:
globe deploy --prodFollow the on-screen instructions to deploy your Dart backend. Globe will guide you through configuring your deployment, including setting up environment variables, choosing a region, and more.
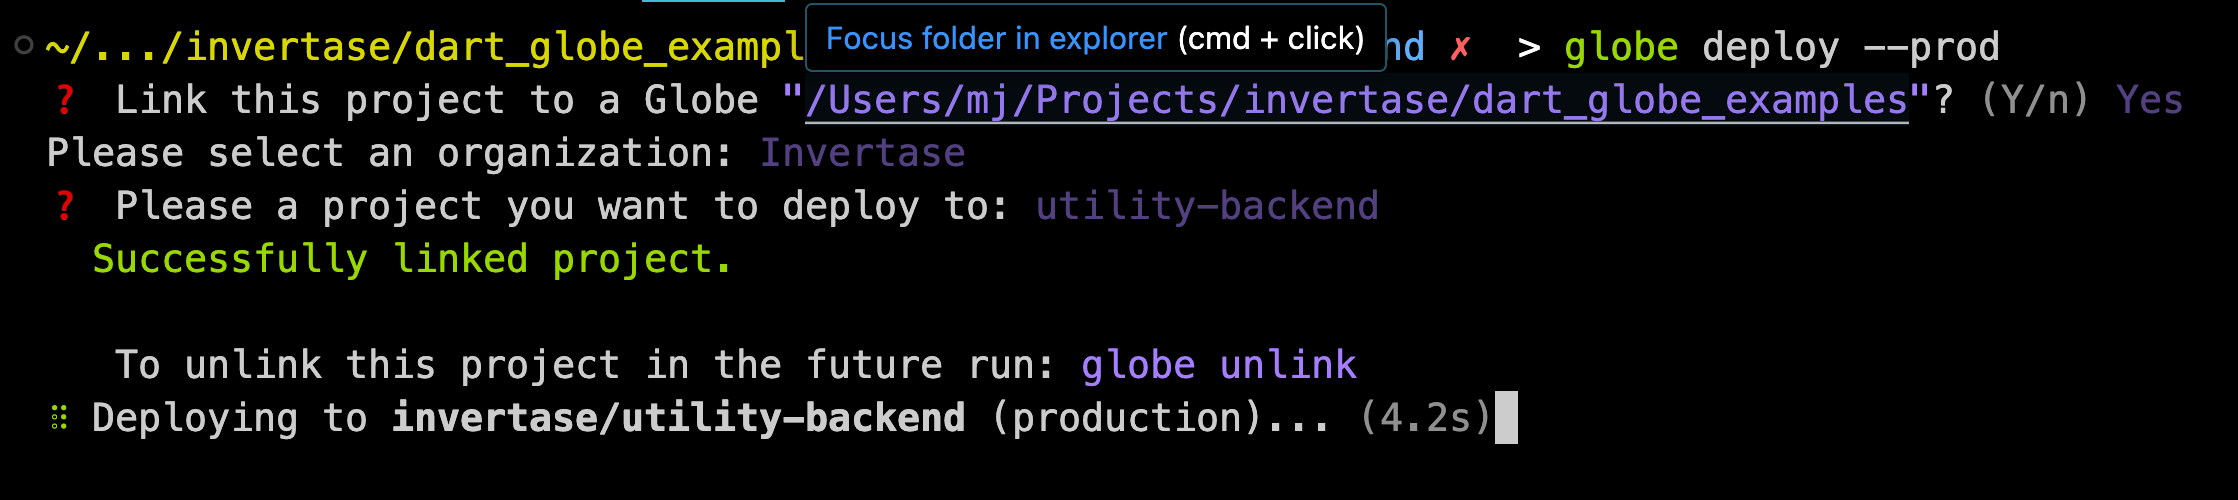
Once deployment is over, you will have access to your production link. For example, in my utility backend, here is the link https://utility-backend.globeapp.dev/
-
Monitor and Manage Your Deployment: Globe provides tools to monitor and manage your application after deployment. You can easily view logs, update your deployment, or roll back to previous versions if needed. Check the Globe Dashboard.

Globe also helps connect your GitHub repository and lets you deploy automatically by git push.

One of the useful features in Globe is the power to give you a preview link with each deployment or git push. You can test your feature before you deploy your application to production; you need to run globe deploy. This feature is much more challenging to achieve in the typical ways we explored in this article.

With Globe, deploying your Dart backend becomes a straightforward and hassle-free process. You can rapidly deploy, update, and manage your applications, allowing you to focus more on development and less on deployment complexities. Globe handles the underlying details, offering a user-friendly approach to deploying Dart backends in the cloud.
The final endpoint to validate images is:
https://utility-backend.globeapp.dev/image/validate
This setup provides a complete solution for uploading, decoding, and validating images in a Dart Frog application, utilizing the image library for processing and the mime library for multipart form-data handling. Remember to adjust the validation logic according to your specific requirements, such as file size validation, which should occur before the conversion to an img.Image object.
If you wish to try this backend online, you can check this simple UI https://utility-backend.globeapp.dev/image
As you can see, Globe.dev will remove the burden of how you would want to deploy and automate your Dart backend. Think of how you can build your app and leave the rest to the Globe.dev
Conclusion
Throughout this tutorial, we’ve delved into various methods for deploying your Dart backend. From working with Virtual Machines to harnessing the power of Platform as a Service solution to exploring serverless environments like Cloud Run and the Dart-optimized features of Global.dev, you’re now equipped with multiple options.
The ideal deployment strategy depends on a few critical factors:
- Complexity: Is your backend architecture relatively straightforward, or does it involve intricate dependencies and custom software layers?
- Traffic Scale and Patterns: Do you anticipate predictable usage or potential sudden bursts of traffic requiring rapid scaling?
- Control vs. Convenience: How much granular control do you want over the underlying infrastructure, or do you value a deployment path that abstracts much of this operational complexity in favor of faster delivery?
- Resource Constraints: Is cost optimization paramount, or are you prioritizing an approach that prioritizes maximum flexibility for customization and scaling?
Let’s now quickly review what we have learned in this tutorial:
- Virtual Machines offer complete control but bring additional management overhead.
- PaaS (like Heroku, App Engine, and Beanstalk) often balances scalability and developer experience.
- Serverless Functions (e.g., Google Cloud Run) excel under unpredictable traffic with their pay-per-use models.
- Global.dev, with its Dart-specific focus, simplifies common needs while remaining a newer offering.
Consider experimenting with different approaches on smaller test projects to find what best suits your team’s workflow and specific project requirements. Don’t hesitate to revisit this tutorial as you build and evolve your Dart backends. Technology, tools, and best practices always change, so explore new options!